MineCraft Optical Character Recognition
Overview
Created June 2020
Source code available on Github >
This project was inspired after seeing a simple script that automates fishing within Minecraft. It uses mss for screencaptures, OpenCV for image processing, and xdotool to simulate inputs.
After seeing the automated fishing, the idea of computer-controlled positioning became interesting. Within Minecraft, there is a debug menu which displays position & orientation. Being able to read this position & orientation information greatly simplifies the problem of computer-positioning, with the other approach approach being some sort of motion tracking / photogrametry. This OCR engine was thus created to extract the position & orientation info.
Minecraft text is very pixelated which allows for a very discrete solution. Dealing with more traditional fonts, a probabilistic approach would be necessary, especially when handling artifacts and anti-aliasing. Here however it is not necessary, and consequently the resulting engine is fast.
Pre Processing
Below is an in-game screenshot with the debug menu open, which is the text in the top left. That is where the position & orientation info is displayed, so all other data is cropped out.
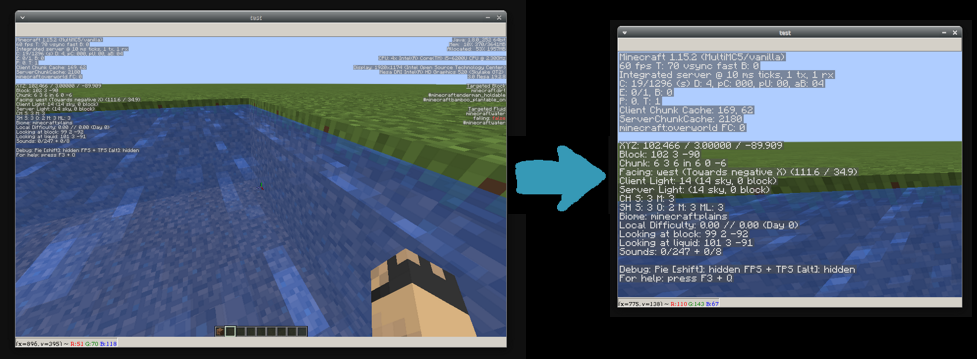
Then, to isolate the text pixels, a color filter is applied.

For consistency, the text needs to be scaled down to be 1 pixels thick.
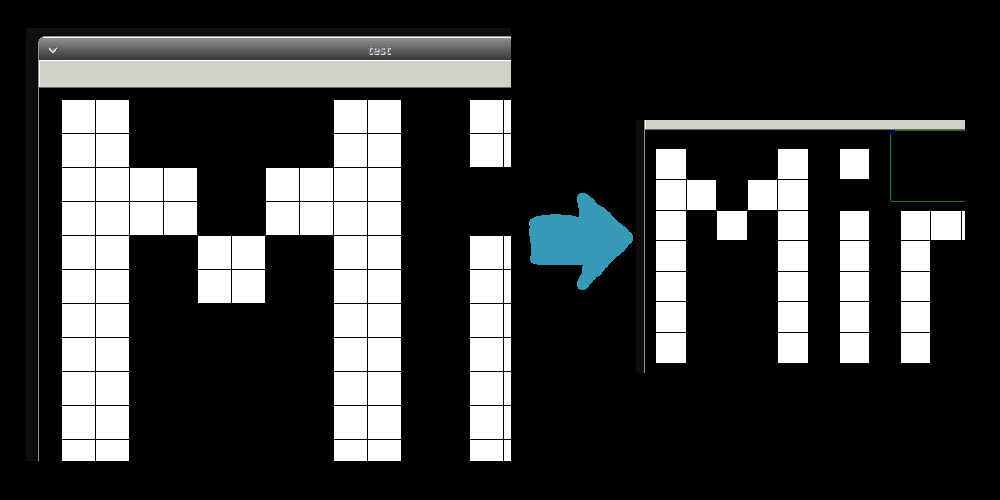
That is all the pre processing applied.
Character Segmentation
After pre-processing, individual characters need to be segmented i.e. bounding boxes found. For example, below is an image of segmented characters, colored by width.

Because the interest is the debug menu in the top left, this algorithm is tailored for a single paragraph of text with left justification. Allowing for multiple paragraphs & different justifications however is not significant additional work.
Starting X-Value
The first step is to find the starting x-value of the paragraph. This is done by sweeping left to right and summing each column of pixels. If the sum is greater than 0, then that column has text in it and is the first x-value.
def first_col_with_white (text_img):
  for column_ind in range(len(text_img[0])):
    column_pixels = text_img[:, col_ind]
    if np.sum(column_pixels) != 0:
      return column_ind

	# In case nothing is found
  return len(text_img[0]) - 1
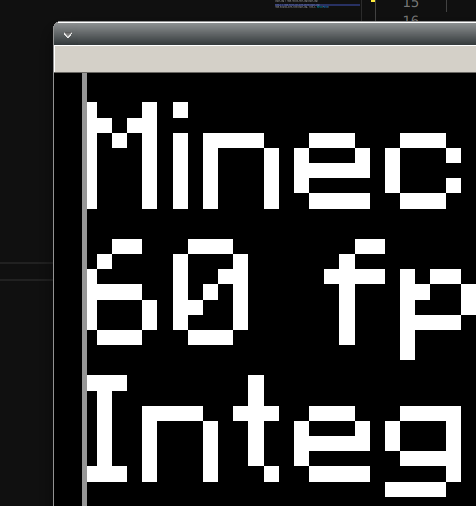
Drawing a line at the x-value, it is clear that it functions.
Baselines
The next step is to find the text baseline which helps define the bottom of the bounding boxes.
Earlier, the first x-value of the paragraph was found by sweeping across columns. Similarly, here rows of pixels are summed to find where there are and aren't pixels. Going through each rows, the pixels are summed and the code checks for a switch from a non-zero sum to a zero sum. This corresponds to switching from a row with character pixels to a row without character, i.e. the baseline.
There is a non-obvious problem here. If a row has descending characters (ex: 'g', 'j', 'y') then the marked baseline will be lower than a row without descending characters. To counteract this, the percentage of white to black pixels is checked. If a text row has descending characters, then the final pixel row will have a low percentage of white pixels. This means the algorithm breaks when a row of text has a lot of descending characters.
Additionally, to speed up the process, only the first 50 pixels are looked at instead of the entire image width.
def get_baselines (text_img):
  # Only look at first 50 pixels
  search_width = 50
  start_x = first_col_with_white(text_img)
  end_x = start_x + search_width

  lines_y = []
  white_in_strip = False
  prev_white_in_strip = False
  prev_slice = []

  for y_val, px_slice in enumerate(text_img[:, start_x:end_x]):
    if np.sum(px_slice) > 0:
      white_in_strip = True
    else:
      white_in_strip = False

    # Hit bottom of a line
    if not white_in_strip and prev_white_in_strip:
      # This algorithm would fail if a line had many g, y, j, etc chars
      percent_white = np.sum(prev_slice) / 255 / search_width
      if percent_white > 0.1:
        lines_y += [y_val + 1]
      else:
        lines_y += [y_val]

    prev_white_in_strip = white_in_strip
    prev_slice = px_slice

  return lines_y
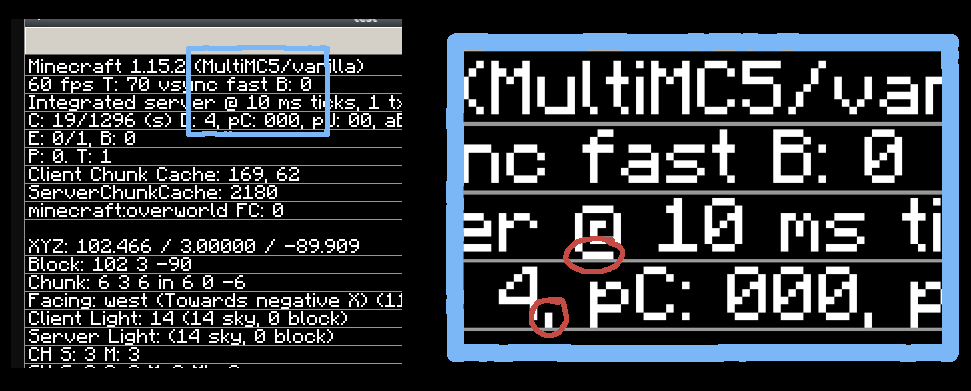
Drawing a line at every y-level it is seen this algorithm works. Notice how even on lines with no descending characters, the bounding box extends down the same as in rows with descending characters.
Character Recognition
With character segmentation done, the final step is to actually recognize characters. Because the text always ends up very pixelated and consistent, the algorithm is custom and deterministic (as opposed to probabilistic).
Algorithm Overview
The idea is simple, look at specific pixels within the bounding box - called flags - and classify based on only those. To further split the classification, characters are separated based on width.
For example, consider the characters with a width of 6 pixels, the '~' and '@'. In order to distinguish between these two, only 1 pixel needs to be considered, one in which the '@' is white and '~' is black or vice versa.
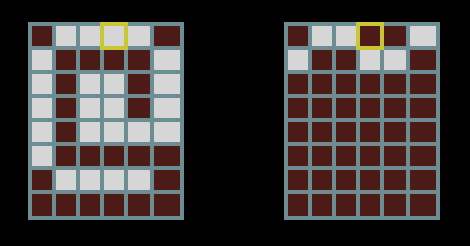
Only 1 pixel is required to discern between a '@' and '~'
Because every pixel is black or white, the combinations of pixels can correspond to bits in a number. With the example above of 6-wide characters, the '~' is stored as a 0 and the '@' as a 1 because of the pixel color. This value is called the character code.
This is actually the entire algorithm, but it may help to see as another example. Looking at 1-pixel wide characters, things get more interesting. With the code, an array of pixel locations for the flags and a map for character codes is stored.
flags_dict = {
  1: [[0,1],[0,0],[0,7],[0,3]],
  ... # More flags for every width
}

char_codes = {
  1: {0: '.', 2: ',', 5: 'i', 8: ':', 10: ';', 12: '|', 13: '!'},
  ... # More codes for every width
}
Then when a character of width 1 is being classified, the pixels in the flag_dict are checked. Each pixel is checked in order and then a character code is generated, which gets plugged into the char_codes map. See the below picture, which classifies a semicolon.
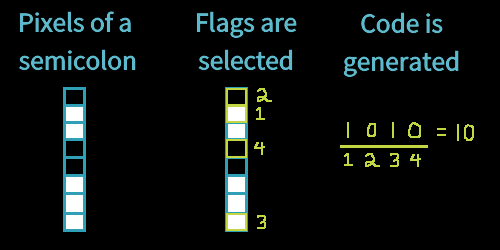
10 is the character code of a semicolon in the above code snippet.
Flags and Codes Generation
This system is robust and fast, but the character codes & flags need to be generated.
To start, I create an image with all characters typed out so it is known which character is in which bounding box.

I generated this image by typing into the Minecraft chat. However, this proved to be problematic later because the font in chat is actually slightly different than the one on the debug menu. Some characters end up being misclassified, but they're deterministically misclassified so a lookup table can be used to remap them.
With this image, I needed to generate ideal flags. After flags are generated it is trivial to make the codes. Originally I attempted an algorithmic approach to flag generation but it proved futile and I opted instead for manual generation, but with assistive scripts.
The script for creating character flags displays all characters overlayed on top of each other. In an ideal flag setup, each flag splits the dataset in half. Simply overlaying and averaging all the characters, I would need to manually look for tone of gray corresponding to 50% overlay. Instead, a color filter is applied to make 50% overlays brighter.
def bias_center (num):
  '''
  maps 127 -> 255, and 0, 254, 255 -> 0
  :param num: a number (0-255)
  :return: the shifted value
  '''
  if num == 255:
    return 0
  return 255 - abs(num - 127) * 2
As flag coordinates are entered via the terminal, the characters are split into separate groups, showing which groups still need to be separated. If a character is entirely distinct based on the existing flag setup, then it is not drawn.
See below a video of this in action